 NMRIH2 WIKI
MODE FILE / ARMAGEDDON 1.0
Survival Mode Guide
How Survival works in No More Room in Hell 2: maps, three waves, speaker defense, extraction, loot, and solo practice.
Quick answer
How Survival works in No More Room in Hell 2: maps, three waves, speaker defense, extraction, loot, and solo practice.

The short answer: defend, survive, extract
Survival is the wave-defense mode added with the Armageddon 1.0 update. The official description says that speakers draw zombie waves away from population centers and into the waiting Responders, so the match is built around holding the defense objective rather than moving through a normal Scenario route. After the defense, the team still has to extract; surviving the waves is not the same as finishing the match.
The launch material describes Survival as faster and more chaotic than Objective mode while keeping the game's normal match and meta-progression loop. That makes it a distinct way to play No More Room in Hell 2, not a cosmetic variant of Scenario. Expect pressure around a fixed objective, limited time to recover between attacks, and a final decision about when to leave.
The three Survival maps
Armageddon launched with three dedicated Survival maps: Flooded, NotLD, and Lighthouse. The official preview also says that each map contains three points of interest, with variation between those points to make repeat runs less predictable. The available material does not provide a complete fixed route or a guaranteed loot list for every point of interest, so this guide keeps the map names and structure separate from details that have not been verified.
The three-point layout matters when a squad chooses where to spend time. A location that is easy to hold may not be the only place that affects the run, and a supply area can pull players away from the speaker at the wrong moment. Treat the points of interest as part of the map's decision-making space, not as a promise that every run will use the same sequence.
How the three-wave structure works
The Survival preview confirms a three-wave structure. The official update notes add concrete timing: Responders have a few minutes to loot and prepare defenses, then must hold each wave for five minutes. After a successful wave, the CRC sends another supply drop and the team moves to the next objective; after three waves, a helicopter extracts the squad. If the team fails two waves, early extraction opens as a way to prevent the run from becoming a total loss.
The developers also adjusted spawning, pressure across difficulties, and the distribution of loot between the map and supply drops, and they added more time to the overall experience while keeping the mode faster-paced than Objective. The sources do not state exact enemy counts or a universal difficulty table, so those numbers are intentionally not listed here.
The speaker is the center of the defense. In practice, a team should treat distance from the speaker, escape space, and access to supplies as one problem: a strong position is only useful if the group can still respond when the next wave changes the approach. Call out a damaged or abandoned position early, keep enough room to move, and do not turn a temporary hold into a fight that blocks the route to extraction.
Loot, supply drops, and progression
Survival is designed to retain the core match and meta-progression experience of No More Room in Hell 2. The official Survival preview specifically says that loot is distributed between the map and supply drops, which means a squad should not assume that every useful item will be found beside the speaker. The exact item table, drop timing, and reward values are not provided in the cited notes and are not filled in with guesses.
The best preparation is therefore practical rather than numerical. Share ammunition and medical items before the next wave, mark a route to supplies that does not strand one player, and keep track of what the team can still carry after a defense. The goal is not to clear every room for its own sake; it is to preserve enough capability to survive the remaining wave and reach extraction.
Night of the Living Dead: the farmstead defense
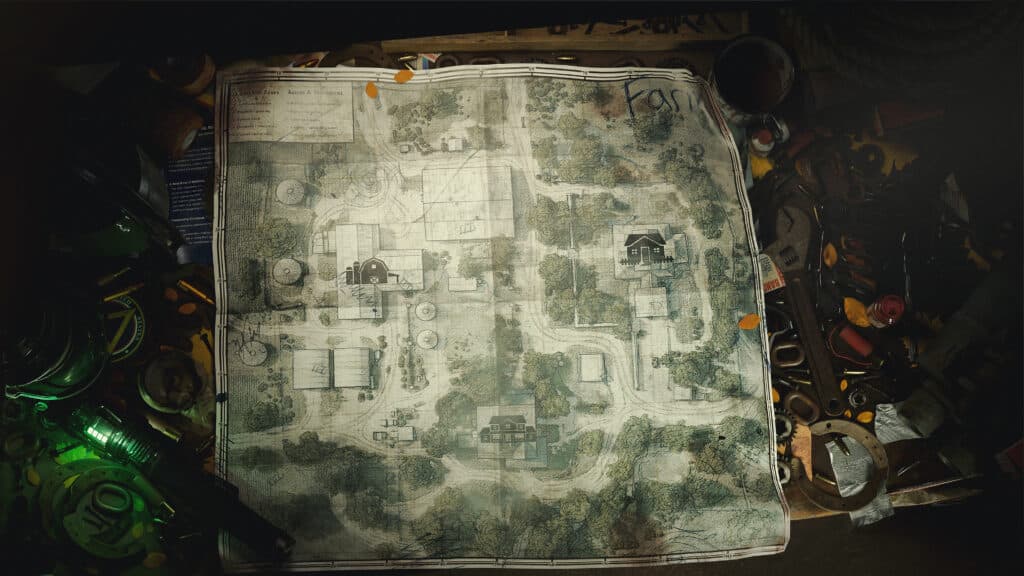
NotLD is the Survival map described in the most detail by the official preview. The farmhouse is the heart of the map and has three distinct floors, while zombies can enter from multiple directions. Traps can help when they are fueled, boards can control some approaches, and the tight hallways and staircases make movement as important as weapon damage.
The defense extends beyond the main house. The guest house has a relatively open floor plan, several exterior doors and windows, a garage with tools and supplies, and a cellar that both Responders and zombies can use. The barn provides the largest interior space for longer-range plans, including fighting across the floor or from its lofts, but its simpler defenses leave Responders more dependent on their own equipment; outside, farm structures and cover shape the horde's approach.

A useful team plan
Before the first wave, agree on who watches the speaker, who checks nearby supplies, and where the group will regroup if the current position becomes unsafe. This is a recommendation based on the mode's confirmed speaker-and-wave objective, not a claim that the game assigns fixed roles. Keep the plan simple enough that a player can follow it while infected, low on ammunition, or separated by a doorway.
During a wave, preserve an escape lane instead of filling every approach with bodies and noise. Use the map's doors, boards, traps, and interior spaces when they are available, but do not treat a defensive object as a permanent safe zone. When the final defense is complete, stop looting long enough to confirm the extraction direction and move as a group; the official overview makes extraction part of the Survival loop.
Difficulty and confirmed limits
The developers say they adjusted spawning and pressure across difficulties, but the cited notes do not publish exact difficulty modifiers for Survival. They also do not provide a complete enemy roster, speaker health value, extraction location list, or reward table. Those omissions are deliberate: a precise number without a dated, repeatable source would make this page look more useful while giving players a false rule.
What can be used with confidence is the structure: three dedicated maps, three points of interest per map, three waves, speaker defense, loot from the map and supply drops, and extraction afterward. If an in-game prompt or a later patch changes one of those systems, the affected detail should be updated as a dated note rather than silently replacing the old rule. Until then, the structure above is the reliable baseline for choosing the mode.
Solo practice and progression risk
Armageddon also added solo matches so an independent Responder can practice and learn the maps. The launch material states that solo practice gives no progress or rewards, while the character does not face the threat of permanent death during that session. Use it to learn the shape of a Survival map, test how the speaker defense feels, and understand where supplies and points of interest sit without risking a developed Responder.
Solo practice is not a replacement for a progression run. It cannot prove that a route will be safe with a full squad, that a supply drop will appear in the same place, or that a defense will use the same pressure in another difficulty. Bring the lesson back to a live match, but keep the evidence limit clear: the cited notes confirm the practice rules, not a separate solo reward system.
Survival or Objective mode?
Choose Survival when you want a faster defense loop centered on waves, speakers, and a final extraction. Choose Objective mode when you want to move through a crafted location, complete critical objectives, and extract supplies as the main structure of the match. Both modes still reward communication, resource sharing, infection awareness, and a decision about when a fight is no longer worth the risk.
The official material does not describe Survival as an easier version of Objective. It describes a different pace and a different way to contribute to the CRC's response, with its own dedicated environments and progression context. Pick the mode that matches the kind of pressure you want to practice, then use the mode's stated objective to decide what to carry and when to leave.
Survival checklist
Before queueing, confirm that the squad understands the speaker objective, the three-wave structure, and the need to extract after defense. During the run, share supplies, protect an escape lane, and avoid letting one point of interest pull the whole group away from the speaker. On NotLD, remember that the farmstead includes the farmhouse, guest house, and barn rather than only the main building.
After a failed run, record the map, point of interest, wave, and the position where the defense collapsed. That information is more useful than an unsupported claim about a universal timer or reward. The mode is built for replayability through variation between points of interest, so a repeatable team note can improve the next run without turning an unverified observation into a rule.
Sources used for this page
The factual sections above are written from the official Armageddon 1.0 update notes, the official Survival and Night of the Living Dead preview, and the official 1.0 launch feature list. These links are provided for source attribution; the guide's gameplay answer is written in full above and does not require opening them.
Sources & Verification
This page separates official facts from community advice. Check the linked official pages when a patch, platform feature, or live-service detail can change.